"How to Install a Diamond Car Wrap Like a Pro"
Installing a Diamond Car Wraps is an excellent way to give your vehicle a dazzling, head-turning finish. While it may seem like a job best left to professionals, with the right tools, patience, and attention to detail, you can achieve professional results on your own. Here's a step-by-step guide to help you install a diamond car wrap like a pro.
Step 1: Gather Your Tools and Materials
Before you begin, ensure you have all the necessary tools. You'll need:
- A high-quality diamond car wrap film
- A heat gun or hair dryer
- A squeegee or application tool
- A sharp utility knife
- Isopropyl alcohol and a clean microfiber cloth
- Masking tape
- Gloves (optional, but recommended)
Step 2: Prepare Your Vehicle
Preparation is key to a flawless wrap. Start by thoroughly washing your car to remove dirt, grease, and debris. Use isopropyl alcohol and a microfiber cloth to clean the surface further, ensuring it's free of any contaminants that could prevent the wrap from adhering properly. Make sure the vehicle is completely dry before proceeding.
Step 3: Measure and Cut the Wrap
Unroll the diamond car wrap and measure it against the section of the car you're working on. Add a few extra inches to your measurements to allow for adjustments. Use your utility knife to cut the wrap to size.
Step 4: Position the Wrap
Carefully position the wrap over the desired area, ensuring it aligns properly. Use masking tape to hold it in place if necessary. Peel back one corner of the backing paper to expose the adhesive side of the wrap.(Gloss Wraps)
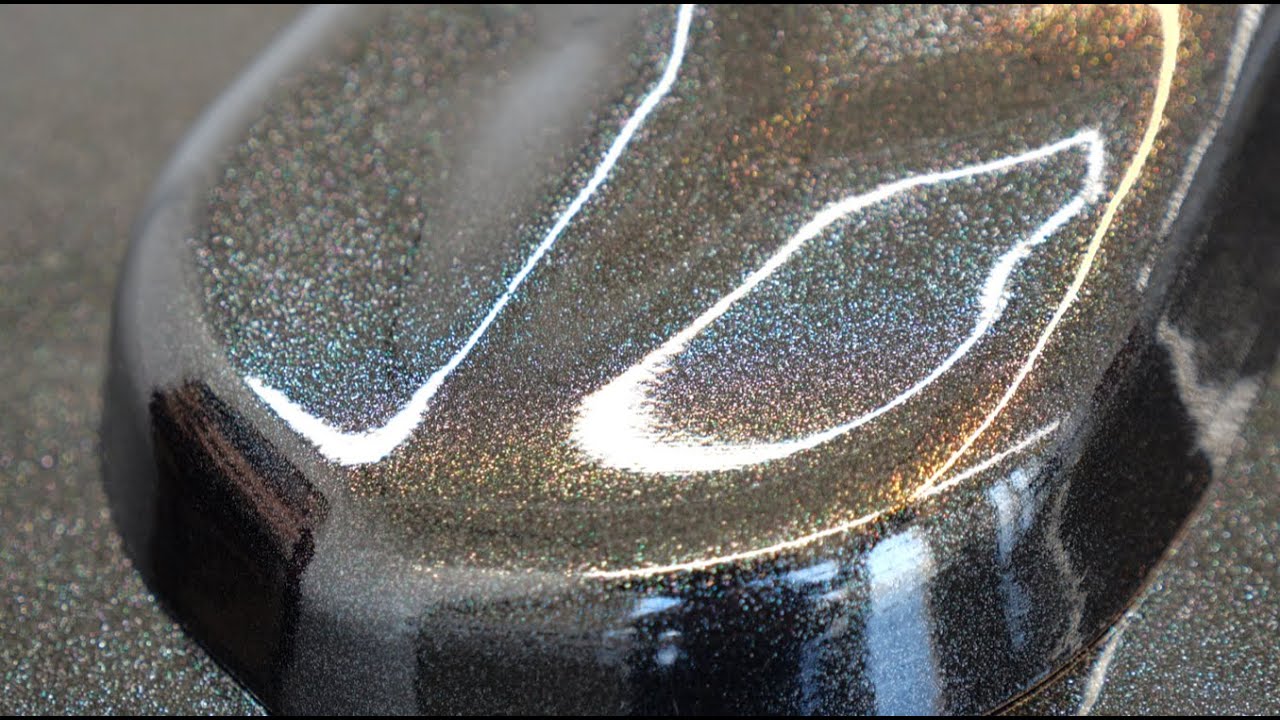
Step 5: Apply the Wrap
Starting from one end, slowly apply the wrap while peeling away the backing paper. Use your squeegee to smooth out the film as you go, working from the center outward to remove air bubbles and wrinkles. Take your time with this step—precision is crucial for a professional finish.
Step 6: Heat and Stretch
Use a heat gun or hair dryer to gently warm the wrap, making it more pliable and easier to stretch around curves and edges. Be cautious not to overheat, as this can damage the film. Stretch and mold the wrap into place, ensuring it adheres smoothly to the surface.
Step 7: Trim Excess Material
Once the wrap is securely in place, use your utility knife to carefully trim away any excess material. Be sure to leave a small margin for tucking the edges under seams or around corners for a seamless look.
Step 8: Post-Heat and Final Touches
After applying and trimming the wrap, use your heat gun to post-heat the entire surface. This step helps activate the adhesive and ensures long-lasting adhesion. Inspect your work for any remaining air bubbles or imperfections and smooth them out as needed.
Conclusion
Installing a diamond car wrap takes time and practice, but with these steps, you can achieve a stunning result that rivals professional installations. Remember to work in a clean, controlled environment and take your time with each step for the best outcome. Enjoy your sparkling new ride!